The selfie

The first selfie
|
Robert Cornelius’ Self-Portrait One of the first things photographers did when they learned how to fix light on a surface was to turn their rudimentary cameras on themselves. The earliest known example comes from 1839, the same year that Louis Daguerre patented the 'invention' of photography as a commercially viable process. Task Intentions For this task we looked at some famous examples of self-portraits in art and photography and to used them to help inspire our own examples. Below are some examples of workI did under the inspiration of the styles of the artists shown. |
Shadow selfies - Andre Kertesz
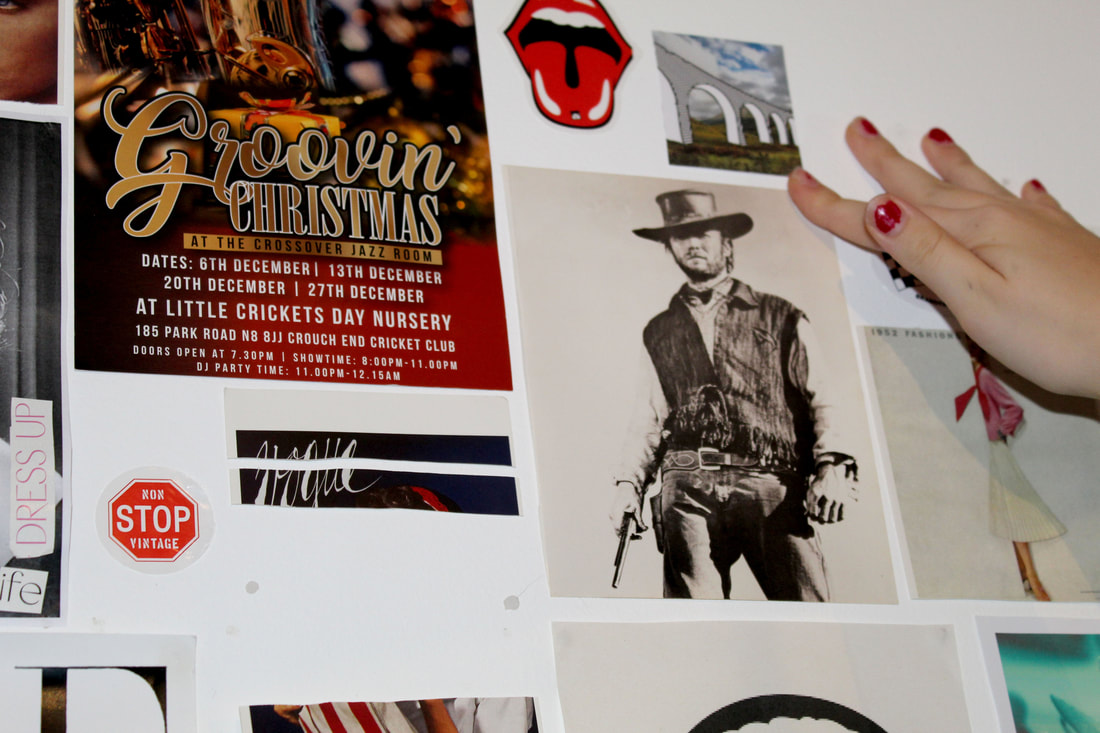
In Andrew kertesz's shadow photographs he takes, I Like how he places the camera in order to successfully manipulate the shadow outline in his images. The outline comes across as very defined and also showcases the camera in detail as well despite the image itself having no colour. In his Images he often likes to project his shadow onto a background that is equipped with some crops, I took inspiration from this by also projecting my shadow onto a wall which is decorated with a variety of posters in one of my images. This makes my photograph come across as more complex and detailed through the use of a unique background.

|

|

|
MY SHADOW SELFIES

|

|

|

|

|

|

|

|
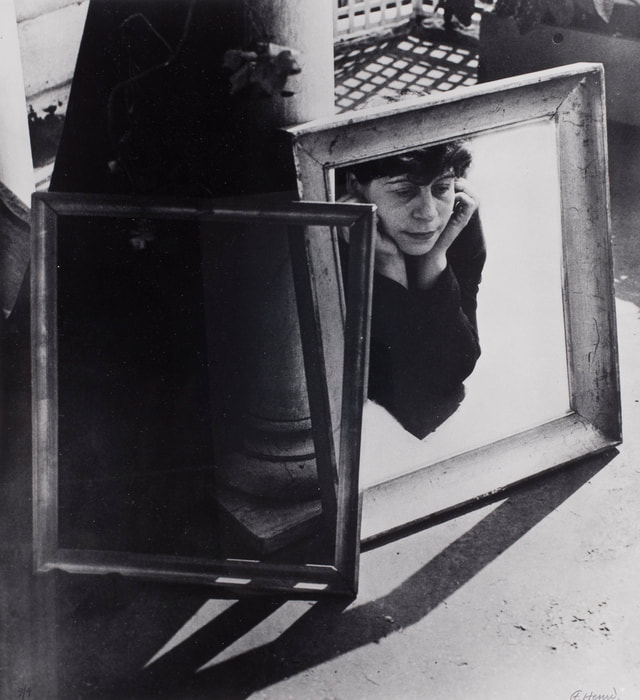
Reflection Selfies Task - Florence Henri
For my reflected task, I focused on the photographer Florence Henri who is a enrolled at the Bauhaus school of art, design and architecture in Dessau in 1927 at which point she turned solely to photography. Henri subverted the formal elements of photography to construct the image surface at will. Between 1928 and the late 1930s, Henri produced her most celebrated works, often using mirrors to manipulate reality to create multifaceted works that expanded the conventional spatial planes and, in doing so, the identity of her subjects. I took inspiration from this to then use different angles within the mirror when taking the photograph. I liked the way my reflection could be manipulated to however I wanted it to, by using different kinds of surfaces for mirrors.

|

|
|
MY REFLECTION SELFIES


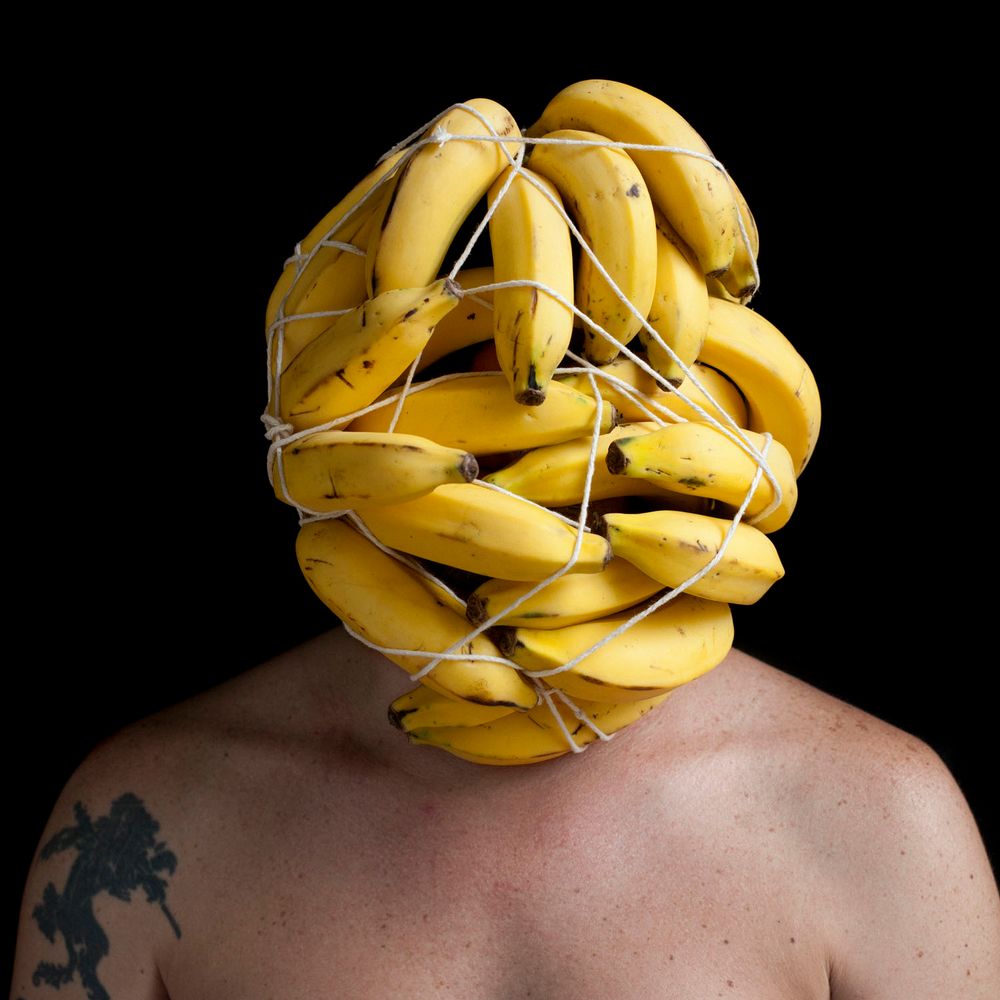
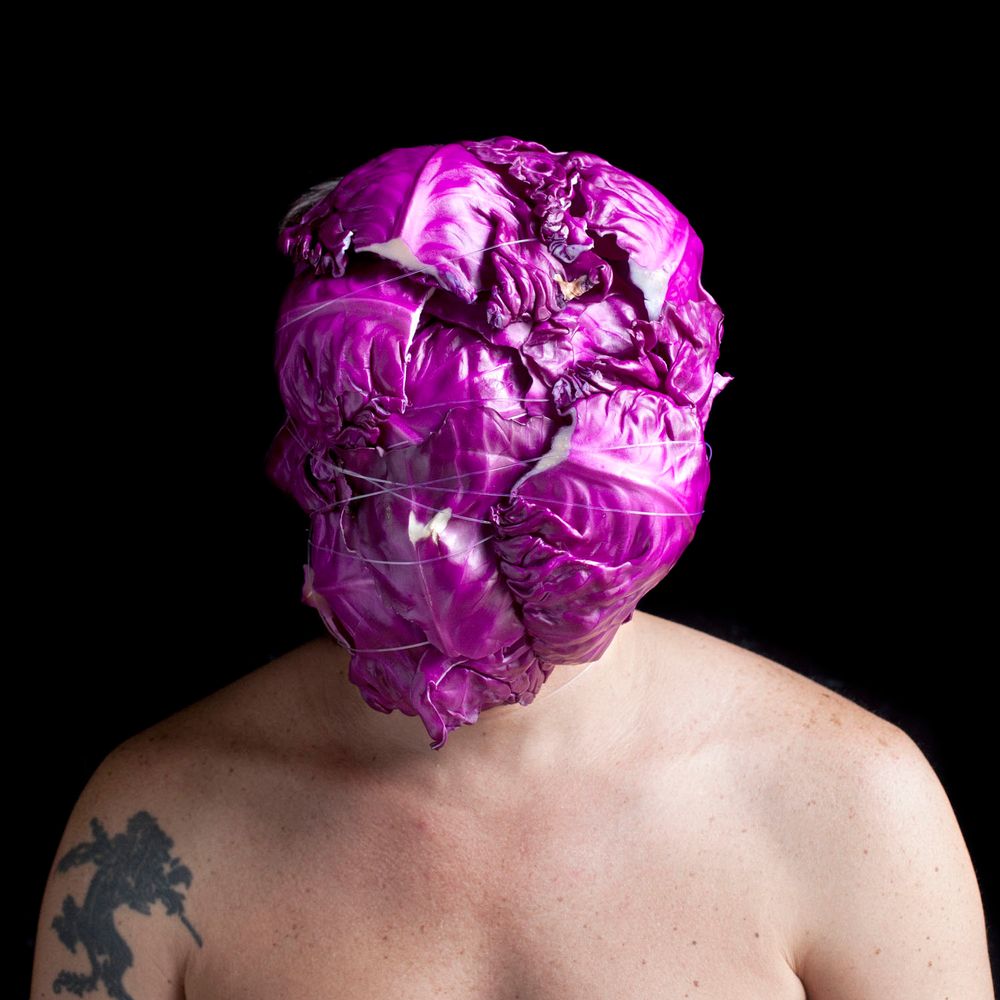
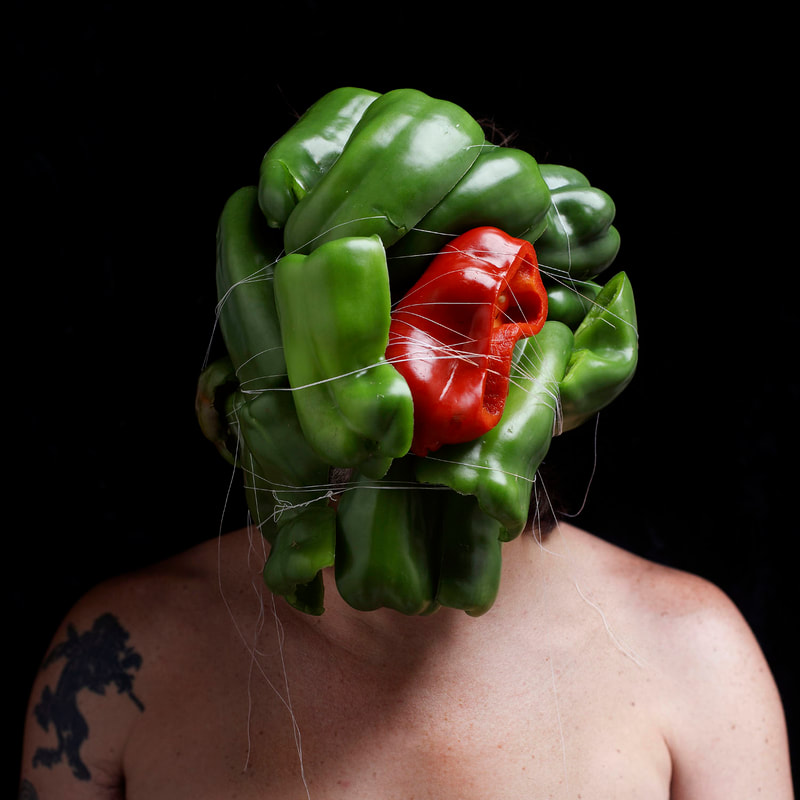
Obscure Selfies - Edu Monterio
Edu Monteiro is a photographer and visual artist. He has been working with photography since 1991, specializing in contemporary research, with emphasis on the intersections between photography and performance. Monteiro was born in 1972 in Porto Alegre, Brazil, and currently lives and works in Rio de Janeiro. He holds a Master in Contemporary Art, in photography, and he is currently pursuing a PhD in Arts Studies. In his project of 'sensory studies', he is constantly trying to push himself out of his comfort zone in order to capture his heightened stress or emotions in his photography.
|
|
|
MY OBSCURE SELFIES


myra greene

|

|

|
character recognition
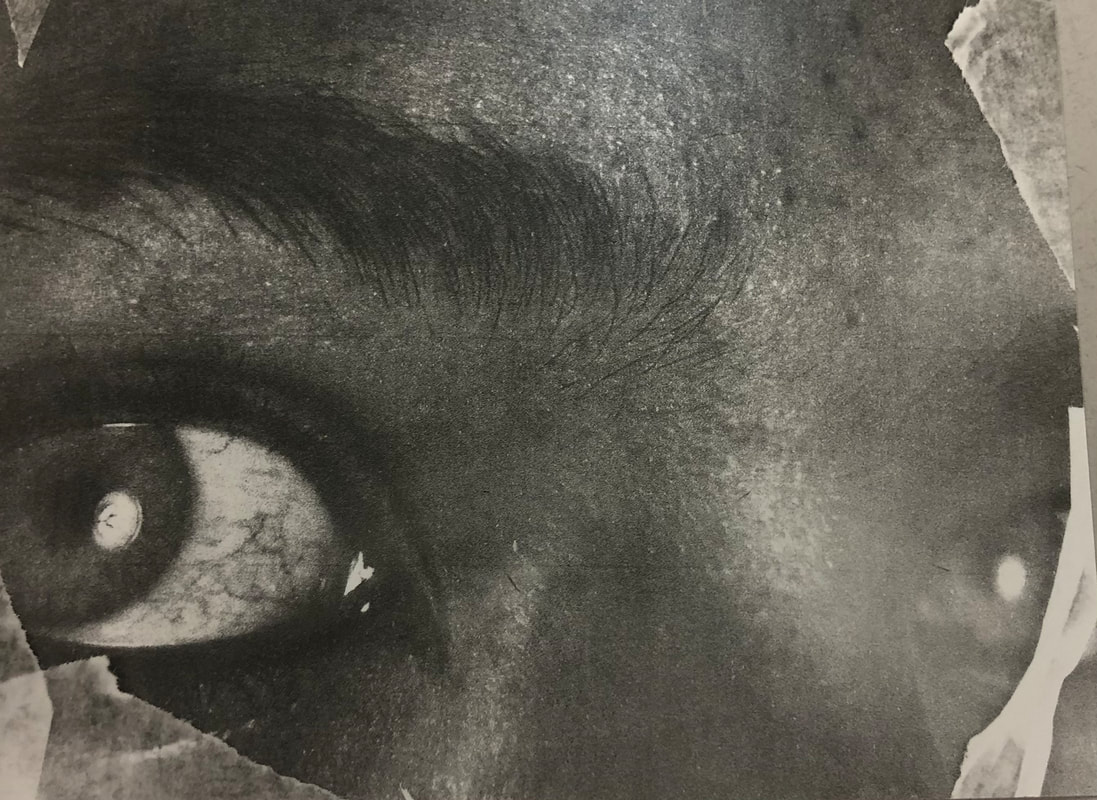
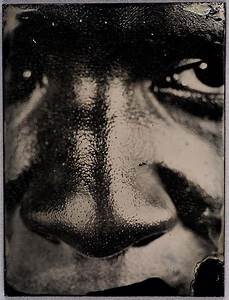
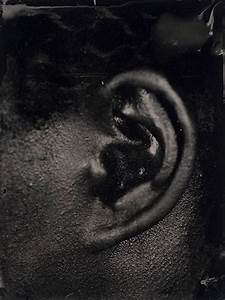
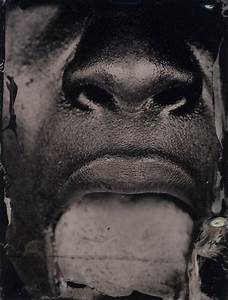
The photographer Myra Greene was interested in the visualisation of the history of slavery which lead her to finding ways to individually explore her ethnic heritage which had passed down her facial features. This is why in her project ' Character Recognition ' she focusses on different parts of her face as a process of recognition and exploration.
Myra Greene's work: 'Character Recognition', includes a series of close up images, which isolate parts of her face. Her images are cropped to isolate specific areas of her face, which she says are 'the features of race', and this is what effectively allows her to individually explore her ethnic features as I discussed before.
One of the techniques that Greene has showcased in her images and was also very interested by was the use of the wet plate collodion technique. Instead of using transparent glass, which is involved in the original technique, she uses black glass which gives her a way to create photographs unlike the others in this technique that appear positive instead of negative. This technique's process involved coating a plate of glass with a thin layer of collodion, and then sensitised in a silver bath. Next while the plate of glass is still wet the glass is exposed using a format camera. The plate can then be developed and fixed to create interesting marks and effects on the image.
By using black glass instead of normal glass Greene is fighting back by showing her images were taken with permission instead of forcefully which is how it would've been when photographs were taken of slaves.
in school task:
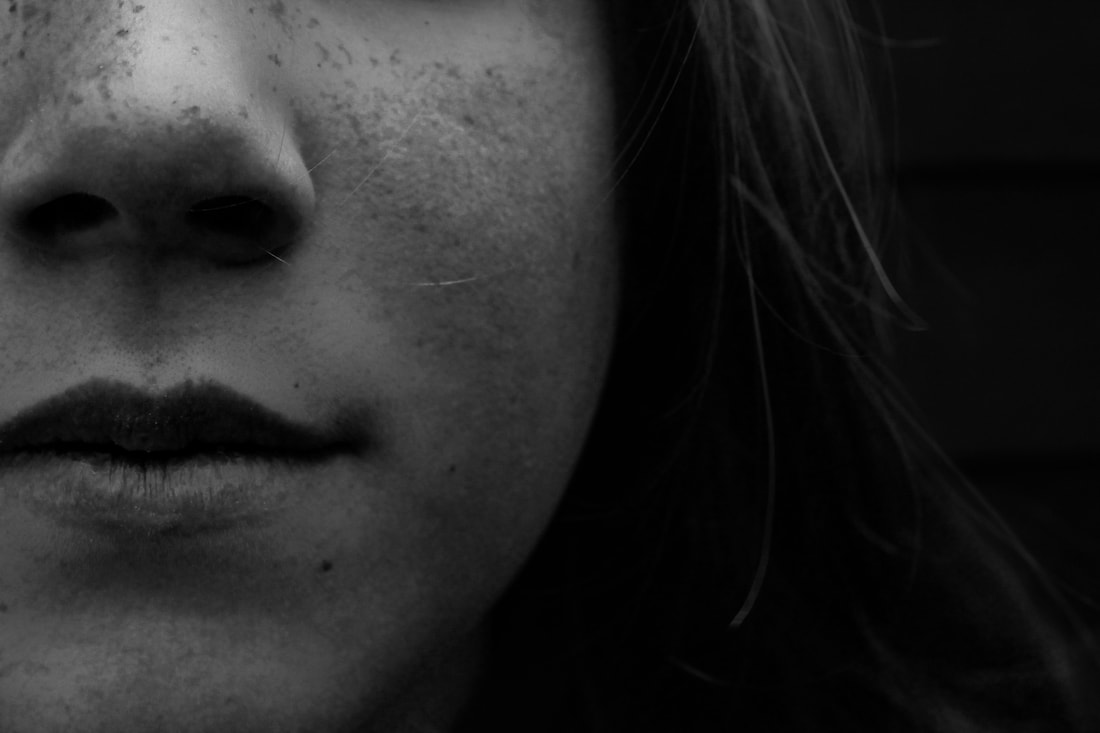
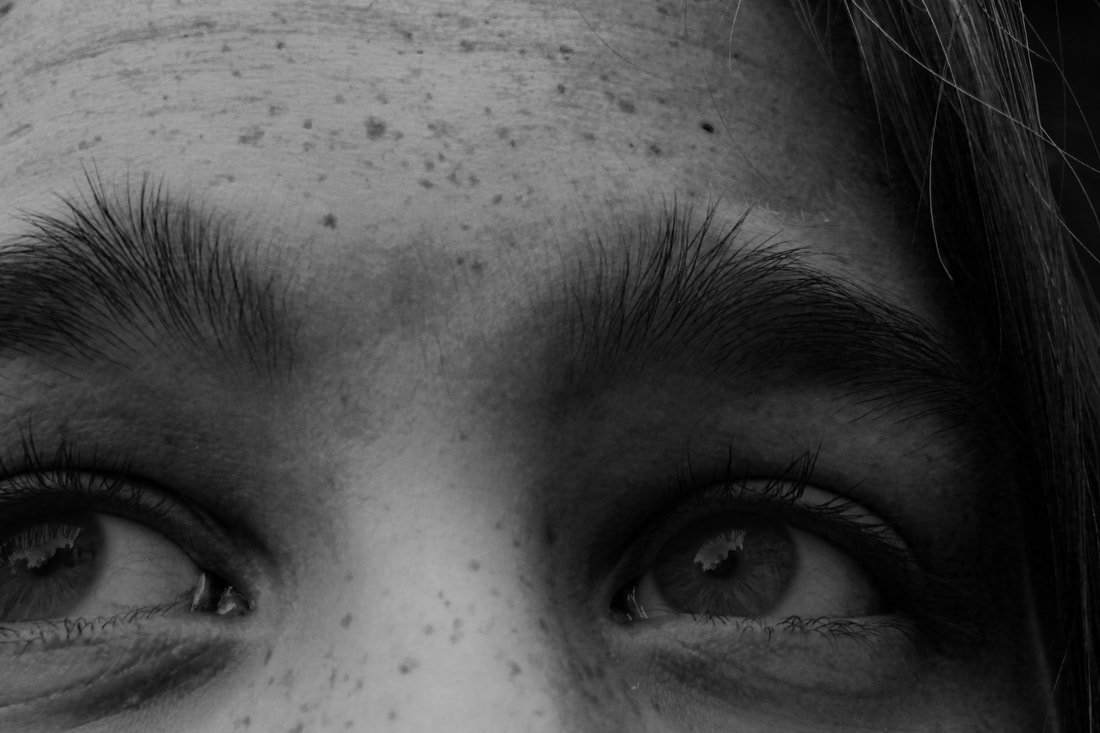
For the first part of my Myra Greene response I began by photographing the individual features of my classmates in class whilst manipulating the image by using a wide variety of camera angles.

|
|


|
|


|
|


|
|


|
|


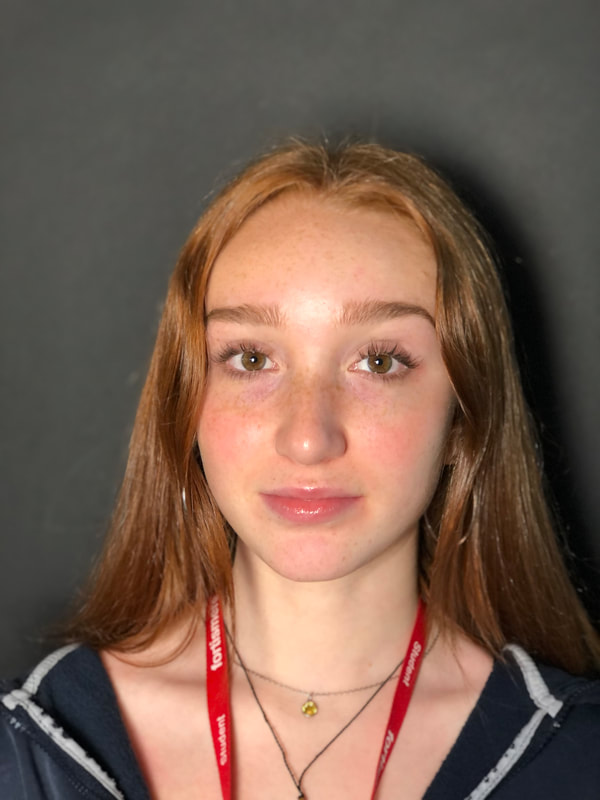
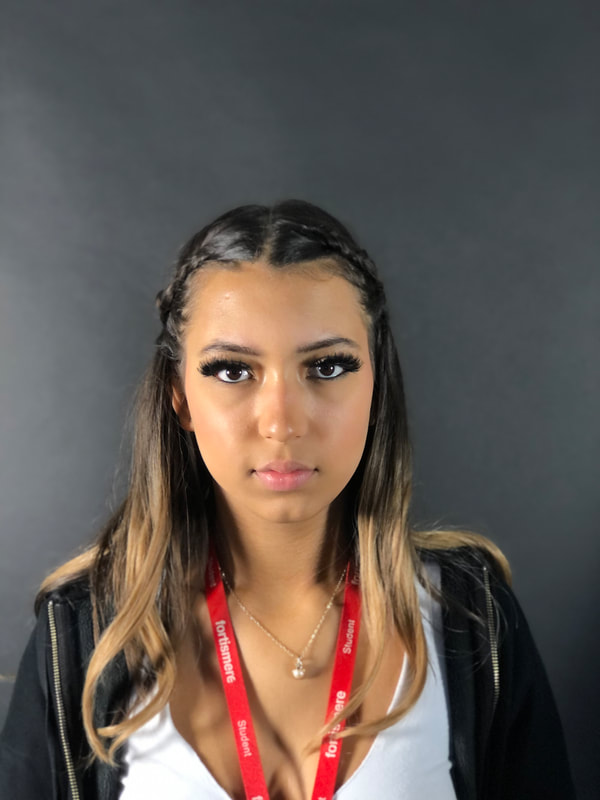
at home task:
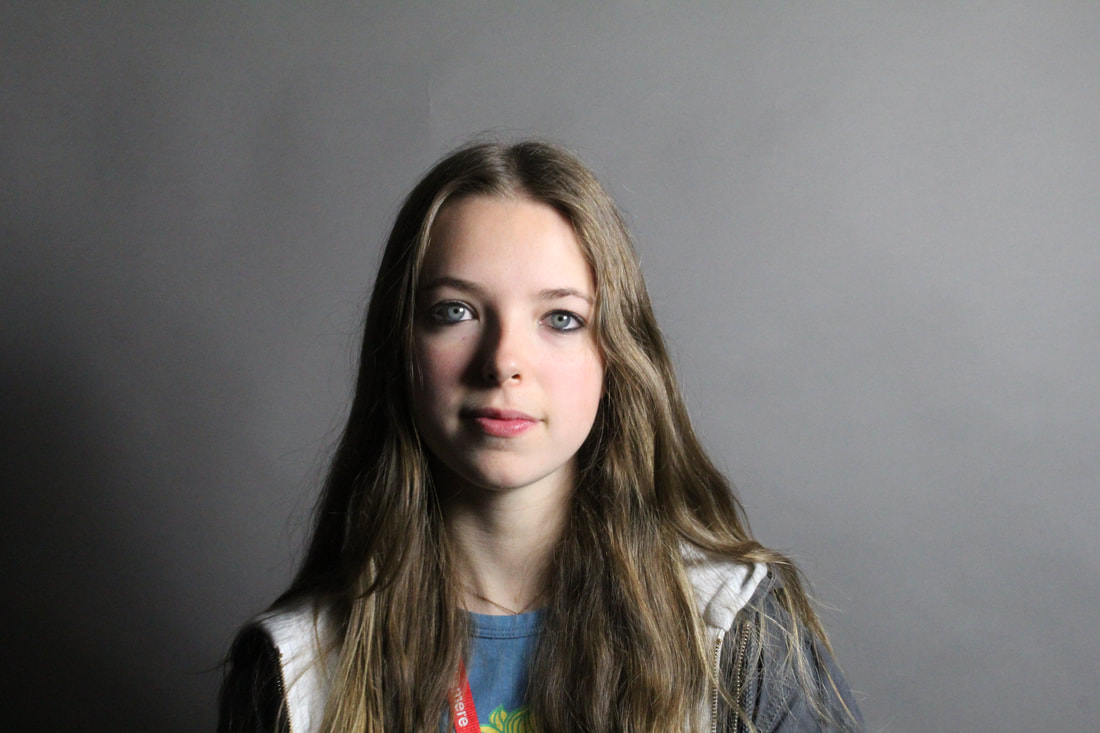
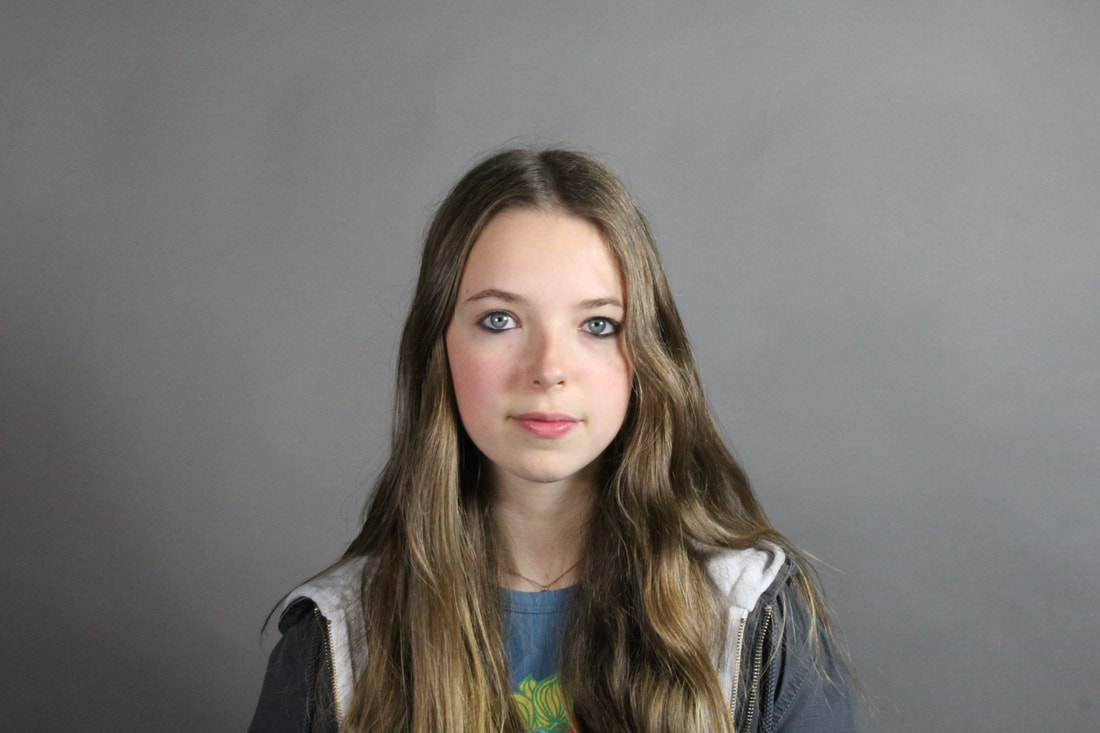
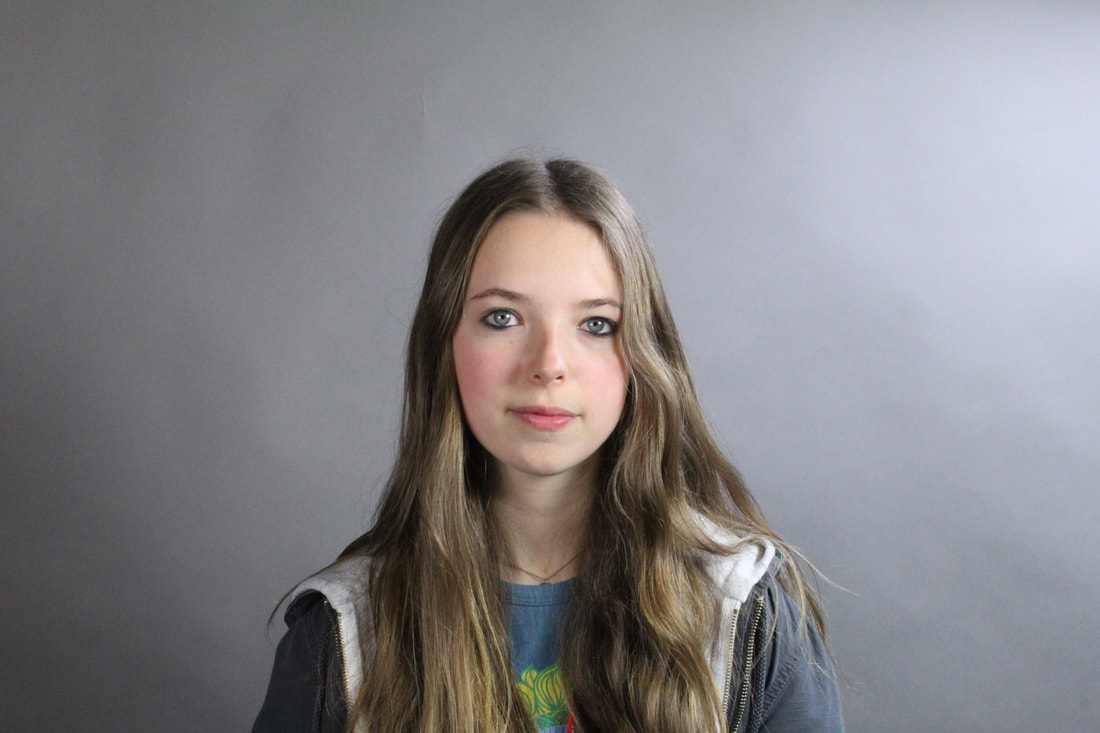
For the second part of my response we were instructed to photograph family at home in a similar style. I used my two sisters as subjects for this task, focusing closely on how I using both camera angle and manipulation of light in certain areas made their features appear to the camera.
|
|

|
|

|


|

|


|
|

|


|

|


|

|
Myra greene
- darkroom development -
After photographing my classmates in a natural light environment I selected the two images that I felt would best portray the style of Myra Greene, and further developed them in the darkroom to achieve the same effect that Myra Greene's images had. These images are presented below:

|

|
Before going into the darkroom I edited my images using the effect on photoshop to bring out the specific details on my subjects faces in a more intense way. By doing this I am making my images appear more in Myra Greene's style before going into the darkroom for that added on effect.

|

|
After editing my images they were then printed in black and white on a special piece of paper which then allowed me to transfer them onto photographic paper in the darkroom, using the sandwich print technique. Before exposing my images to the photographic paper I made a test strip in order to see the best time that the photographic paper should've been exposed to the light; exposure time in other words.

Once I had exposed both of my two images I began to experiment with two different techniques as an attempt to make my images appear more like Greene's. The first technique I tried included dripping the developer solution down the different sides of my photograph after it had been exposed to the light. This technique resulted in having an abstract effect on my image by some parts of the image appearing in the shape of the drip, and other areas were left undeveloped or appeared lighter. The next technique I used was to use masking tape to cover parts of my image around the edges to create a look that was similar to hers. To do this I stuck the tape on my images before exposing them to the bright light, and then once they had been exposed I put them through the developer trays without the tape on. This lead to light only been able to partially expose the paper in some areas whilst the rest of the photograph contrasted by being darker, as masking tape is translucent thus the lighter effect.
|

|

|

|

|

|
valerie kabis
- shadow and light -
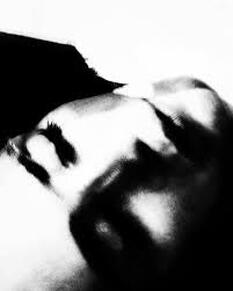
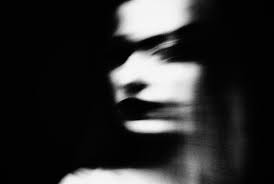
Valerie Kabis was intrigued in the effects that low light photography produced, and how shaped and shadows that were casted upon a model manipulated the photo. To do this she experimented with light, both bright and dark, shadows and this created a series of dark and abnormal photos.

|

|
|
In class we experimented taking some photos using her particular style and then editing it later by manipulating the levels on photoshop to achieve the same dramatic effect. Below is a collection of my unedited photos and then my edited.
In order to achieve a similar result to Kabis's images, the stark contrast in light and dark shades, I used a torch to direct the light on the models face to create a variety of certain shadows and shapes. To help maintain the dark background before editing a black set background was used as well.
In order to achieve a similar result to Kabis's images, the stark contrast in light and dark shades, I used a torch to direct the light on the models face to create a variety of certain shadows and shapes. To help maintain the dark background before editing a black set background was used as well.


I then using photoshop edited my favourite images that I thought best replicated the style that Valerie Kabis explores.

|

|

|

|

|
m

|

|

|

|

|

|

|


|

|
Below are the three selected images in which I feel best communicated the task intentions of this project.
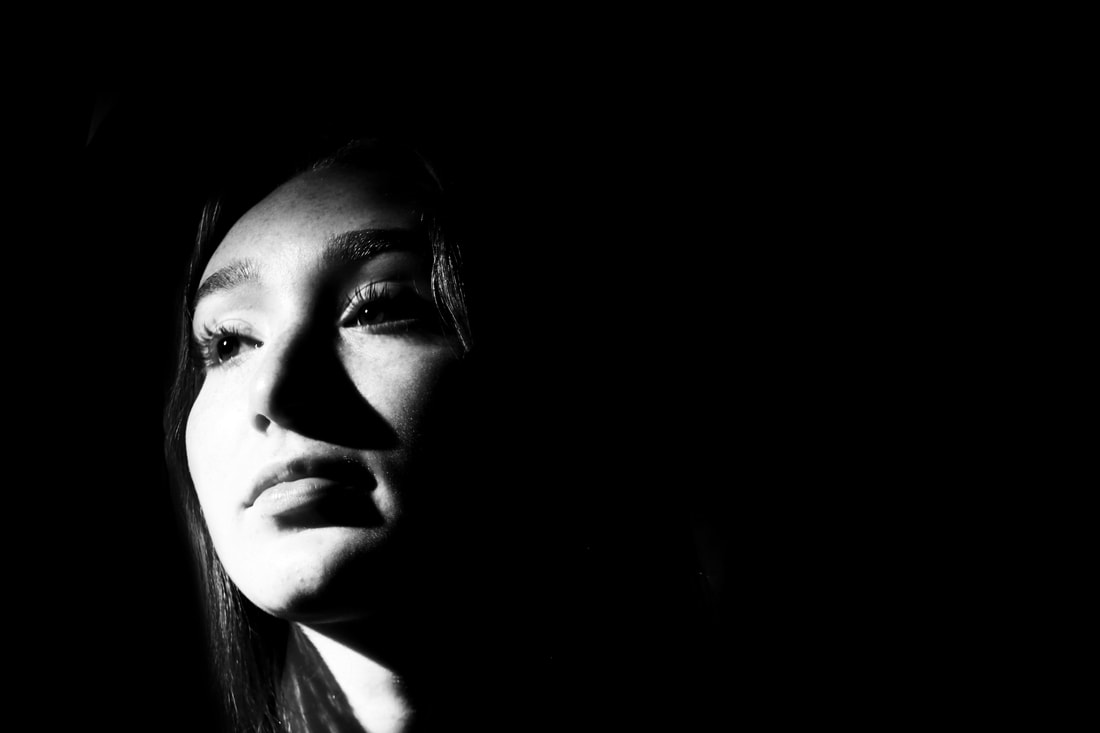


I think overall I demonstrated a good knowledge of my skills in photoshop. In order to replicate the stark contrast of the dark and the light that Valerie Kabis exhibits in her work, I had very dramatic levels and increased the contrast on several of the images shown above. As well as this I believe that when taking the images I manipulated the light really well in order to highlight certain angles on her face. However I could of improved on my images by adding more of a variety of the blurred style that Kabis is known to use as well.
lighting
For this task we experimented with different types of lighting techniques used in photography such as:
- Tungsten
- natural
- Forced ( fill light, Main light and Hair light )
- Tungsten
- natural
- Forced ( fill light, Main light and Hair light )
Main Light
As the model is directly in front of the camera as well as facing it, the main light is positioned above her head and to one side. The light leaves the effect of creating shorter shadows on the left side of her face and below her chin.
|
Fill Light
This light is less intense than the main light, and it also fills in the shadows that were the effect of the intensity of the main light before. It is positioned on the opposite side of the models face.
|
Hair Light
This third light is placed directly above the models head, more towards the north-east side of the screen, which highlights their hair and adds more light to fill in other unknown gaps.
|
Tungsten
Tungsten lighting is known to be a very warm artificial lighting. It is varies from yellow to orange, and quite often is seen in domestic environments, such as in ovens, lamps and kitchens. I used a tungsten studio light to create these images, which created a warm tone to my models skin, and also dark shadows on the side further away from the light.


Natural Lighting
The use of natural lighting can have a soft glow to the models face and can easily be manipulated by using the different angles. For example the light can softly highlight areas of Emma's face whilst leaving some untouched and rendered to a darker shade. To properly demonstrate the dramatic effect a simple change in angle with window lighting I shot at multiple different angles
The use of natural lighting can have a soft glow to the models face and can easily be manipulated by using the different angles. For example the light can softly highlight areas of Emma's face whilst leaving some untouched and rendered to a darker shade. To properly demonstrate the dramatic effect a simple change in angle with window lighting I shot at multiple different angles


lewis khan response

George town
|
Task Intentions
In this task I was required to In reference to the work of Lewis Khan and the brief set photograph a chosen person that has particular relevance to you. We had to attempt to capture their everyday life and all things that are unique to them. In order to meet the task intentions I photographer my close friend Adela, during the day we visited a favoured place of hers; Chinatown. Later on, I visited her room and she presented all the items she felt best represented her. |
Lewis Khan was a photographer who's work centres around the people living around him. As he grew up in south London, He would often always see this man called George, who was the inspiration for his well known work "Georgetown", wondering around the streets. They would sometimes smile at each other, say hello or join each other to play some football. Khan decided to create Georgetown after six years of these random interactions, and created an insight for viewer's to see into his unique life. The project included multiple wide shots of George walking from street to street as well as an inclusion of close up shots of his face, images of his belongings and personal photographs, as well as clips of George doing the most mundane things, like taking trips on the bus. This wide variety of viewpoints allow the audience to gain a more detailed experience and understanding insight into his life.
Khan said 'Portraits can be taken anywhere and often the most powerful images are taken of everyday life. From the extraordinary to the mundane all subject matters can create exciting and inspiring photographs.'
Khan said 'Portraits can be taken anywhere and often the most powerful images are taken of everyday life. From the extraordinary to the mundane all subject matters can create exciting and inspiring photographs.'
Adela in her favourite place in London -

|

|

|

|

|

|

|

|

|

|

|

|

|

|

|

|

|

|
I chose to photograph her in Chinatown as its holds significance to her as it is where she works. In the images above Adela is in a grocery shop that she often visits to get lunch before going to work. I also have her in some shots drinking a favourite drink or standing in a preferred position.
Adela in her room -

|
|

|

|

|

|

|

|

|

|

|

|

|

|

|

|

|

|
second task: photographing school staff
For the second part of the documentation task we were asked to travel around the school attempting to catch staff in their natural work environment.
|
South wing Kitchen Staff
|
Library Staff
|


Office Staff


North Wing Office staff


DT Staff


ben watts
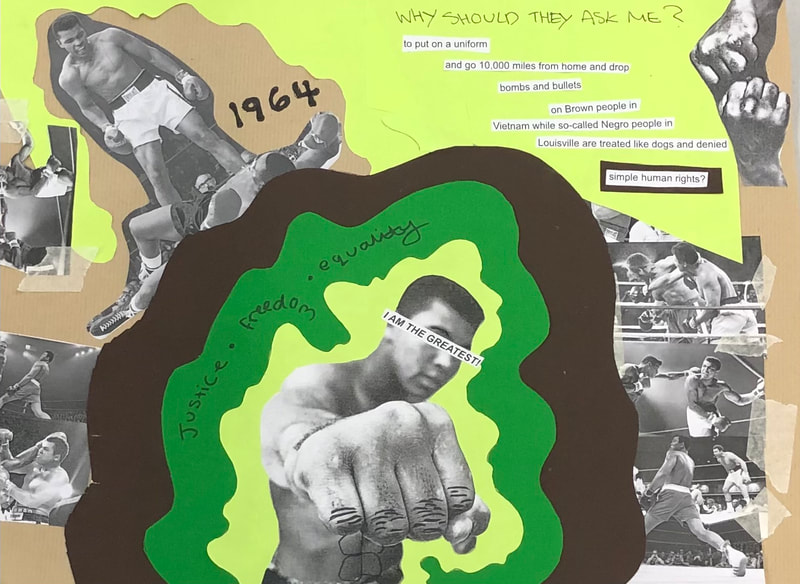
Ben Watts is a British-born photographer based in new York who is interested in documenting urban youth and is also particularly fascinated by hip hop culture. In his project 'The Big Up Portrait' he uses collage technique to express his fascination by the faces and energy of New York's urban youth culture. Big Up is an array of portraits featuring rappers, boxers, dancers and other street characters.

|

|

|
For this task we were requested to make two collages, one in which was targeting on Muhammad Ali and his values and the second one was to capture our experience in the year 2021.
|
In this collage I have placed light green, dark green and black lines around him in order to direct focus and attention to the middle of the image. I think that with the use of those green lines surrounding the centre image audience attention is successfully placed there and it is the first thing they encounter before exploring other parts of the image. Within the lines I wrote his three most important things he valued and I like how I put them within the lines so the audience immediately see them, however the words could've been made bigger or more powerful in order for a greater impact to have been made. I also highlighted the creases in his knuckles to emphasise the hard work and dedication he put in in order to achieve what he has now. I also put my favourite quote of his in sectioned pieces to have a more powerful effect when reading it, I like how I highlighted the 'simple human rights' piece of text as it is emphasising the values he stood for. By doing that across the collage the audience are now made more aware of important morals he had and now can reciprocate those values.
|
|

In my own urban themed portrait I wanted the viewer to get a sense of what is important to me as well as what make me who I am. In order to emphasise this I placed multiple photographs of famous London sites such as the clock tower and the London Bridge as well as the underground sign. These relate to my personal life as I am often in central London with friends and my main method of transport is the underground. This is also why I have placed a train ticket on my collage as well as the train station 'Finsbury park' as it is the one I have always used therefore has a level of significance to me. Around the portrait you also see splashes of Blue drawn by using blue pastel, I have always favoured the colour blue and therefore wanted to incorporate it into my portrait. I like how I have a vivid blue flame situating around myself in order to emphasise who the portrait is about. I also like how I have lots of blue evenly distributed throughout the portrait so that it doesn't feel too crowded in one spot. And finally I have placed several photographs of myslef and my friends showcasing our favourite vents throughout the year such as fireworks night, DofE and prom.
Independant development
To begin my Independent development I have chosen to pursue the ideas of both Myra Greene and Ben Watts by combining their two unique styles. I will start by photographing my two different models, they are siblings and this knowledge is important later on, using a similar style in which Myra Greene photographs a variety of facial features up close.
Some of her examples are presented below:
Some of her examples are presented below:
|
|
|
The second part of my development featuring the style of Ben Watts. For this part I am using his style of using collage to bring attention to certain similar or different facial features shared amongst the two of them. However, to intertwine this section of my development to the first, Myra Greene inspired, I will be making a collage of the intense close-ups of their facial features focusing on their linkage through blood and familial connection.
Myra Greene section
First Model, ( The Brother )
Myra Greene section
First Model, ( The Brother )


Edited and favourite selection

|

|

|

|
The Second Model, ( The Sister )


Edited and favourite selection

|

|

|

|
second development experimentation
My intention of combining the two siblings lead me to the idea of this geometric line collage style:

|

|

|

|
After experimenting with this style of collage I decided to as my next piece of development to do a Full facial feature collage as my third development for the Brother and the same for the sister individually, using my images taken at the start of my independent project in the the style of Myra Greene. When I finished both collages digitally as shown below I then Using physically printed images decided on combining the features from the siblings that stand out the most in the way that they appear similar to each other or differ greatly.
Below are my completed separate collages of each sibling.
Below are my completed separate collages of each sibling.
third development
The Sister

The Brother

Third developmement


Portraiture Assessment
Some good images especially in your Myra Greene section. The images show strong composition and have good contrast. The photoshop work is good and clearly builds on your previous knowledge learnt at GCSE. Your lighting workshop is visually good and again you show a strong understanding of camera technique. However there are some descriptions of processes that are missing; these need to be done in full clearly stating what your intentions are for the tasks. these sections have to be done alongside the other set tasks sections you are missing.
Will consider the idea of combining images of The brother and The Sister in a digital combination. Will also consider a physical weave of the different images in the style of David Tsern and the other images shown in the pinterest Board
https://www.pinterest.co.uk/pin/351912457325980/
